Apple has introduced security keys as an additional step to help users protect their Apple ID accounts. Keep reading to learn why the alternative authentication method is the most secure method available and what you need to do to set it up.
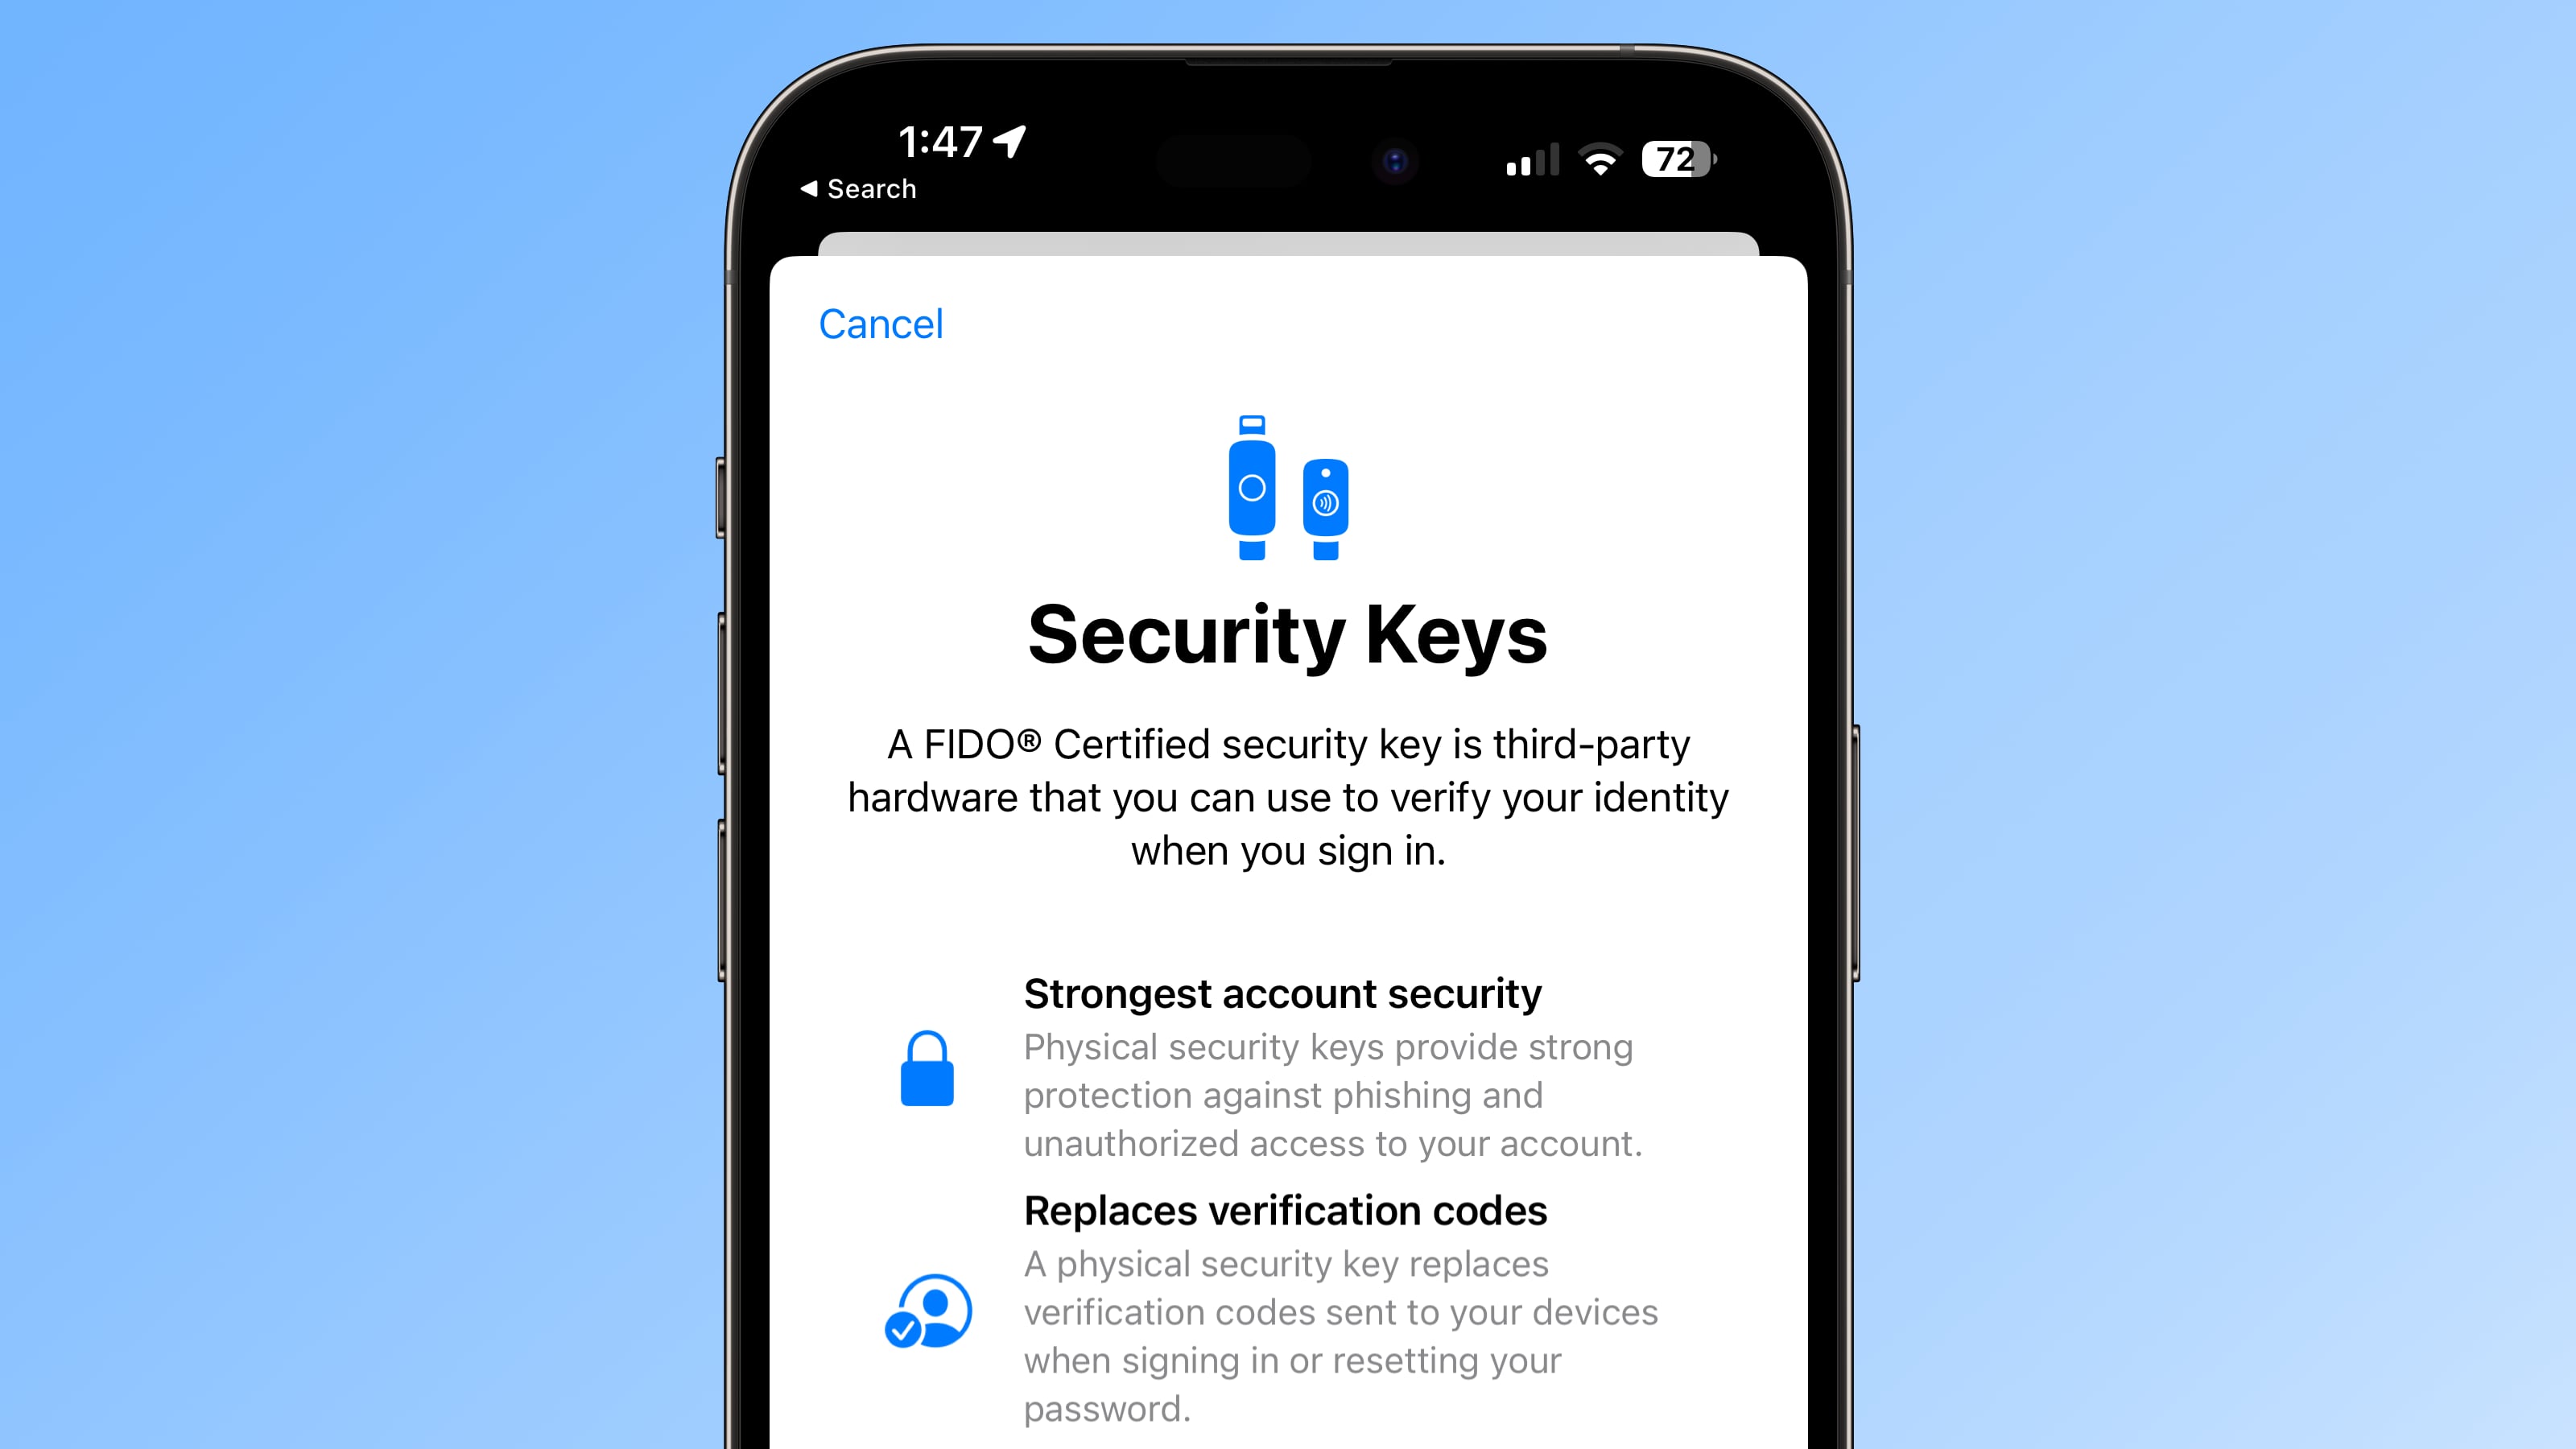
What Are Security Keys?
With the release of iOS 16.3, iPadOS 16.3, and macOS Ventura 13.2, Apple introduced support for security keys, or physical devices that can verify your Apple ID instead of a passcode.
Apple designed the feature for people who require additional protection from targeted attacks, such as phishing or social engineering scams.
The extra protection that security keys provide means that if someone had your Apple ID and your password, they still would not be able to access your account without your physical security key, which replaces the traditional verification code provided by two-factor authentication.
How Do Security Keys Work?
With a security key enabled, signing into an Apple ID requires entering your account’s password and then using a security key to complete the two-factor authentication process, instead of the traditional six-digit verification code that is sent to another Apple device signed into the same account.
Why It’s Worth Using Security Keys
It’s worth noting from the outset that using physical security keys puts the onus on you to be careful not to lose them, otherwise you could permanently lose access to your Apple account. This is why Apple requires users to set up at least two security keys, and supports up to six in total.
Having two physical security keys set up means you can keep them in more than one safe place. For example, you could keep one at home and one in your workplace, or you could keep one with you when traveling while the other one remains safe at home.
Once you have security keys set up, you can use them to sign in with your Apple ID on a new device or on the web, reset your Apple ID password, and add additional security keys or remove them from your account.
What You Can’t Do With Security Keys
There are a few things worth noting that you can’t do with security keys.
- You can’t use them to sign in to iCloud for Windows.
- You can’t sign in to older devices that can’t be updated to a software version that supports security keys.
- Security keys don’t support child accounts and Managed Apple IDs.
- Apple Watches that are paired with a family member’s iPhone aren’t supported.
Security Keys Worth Considering
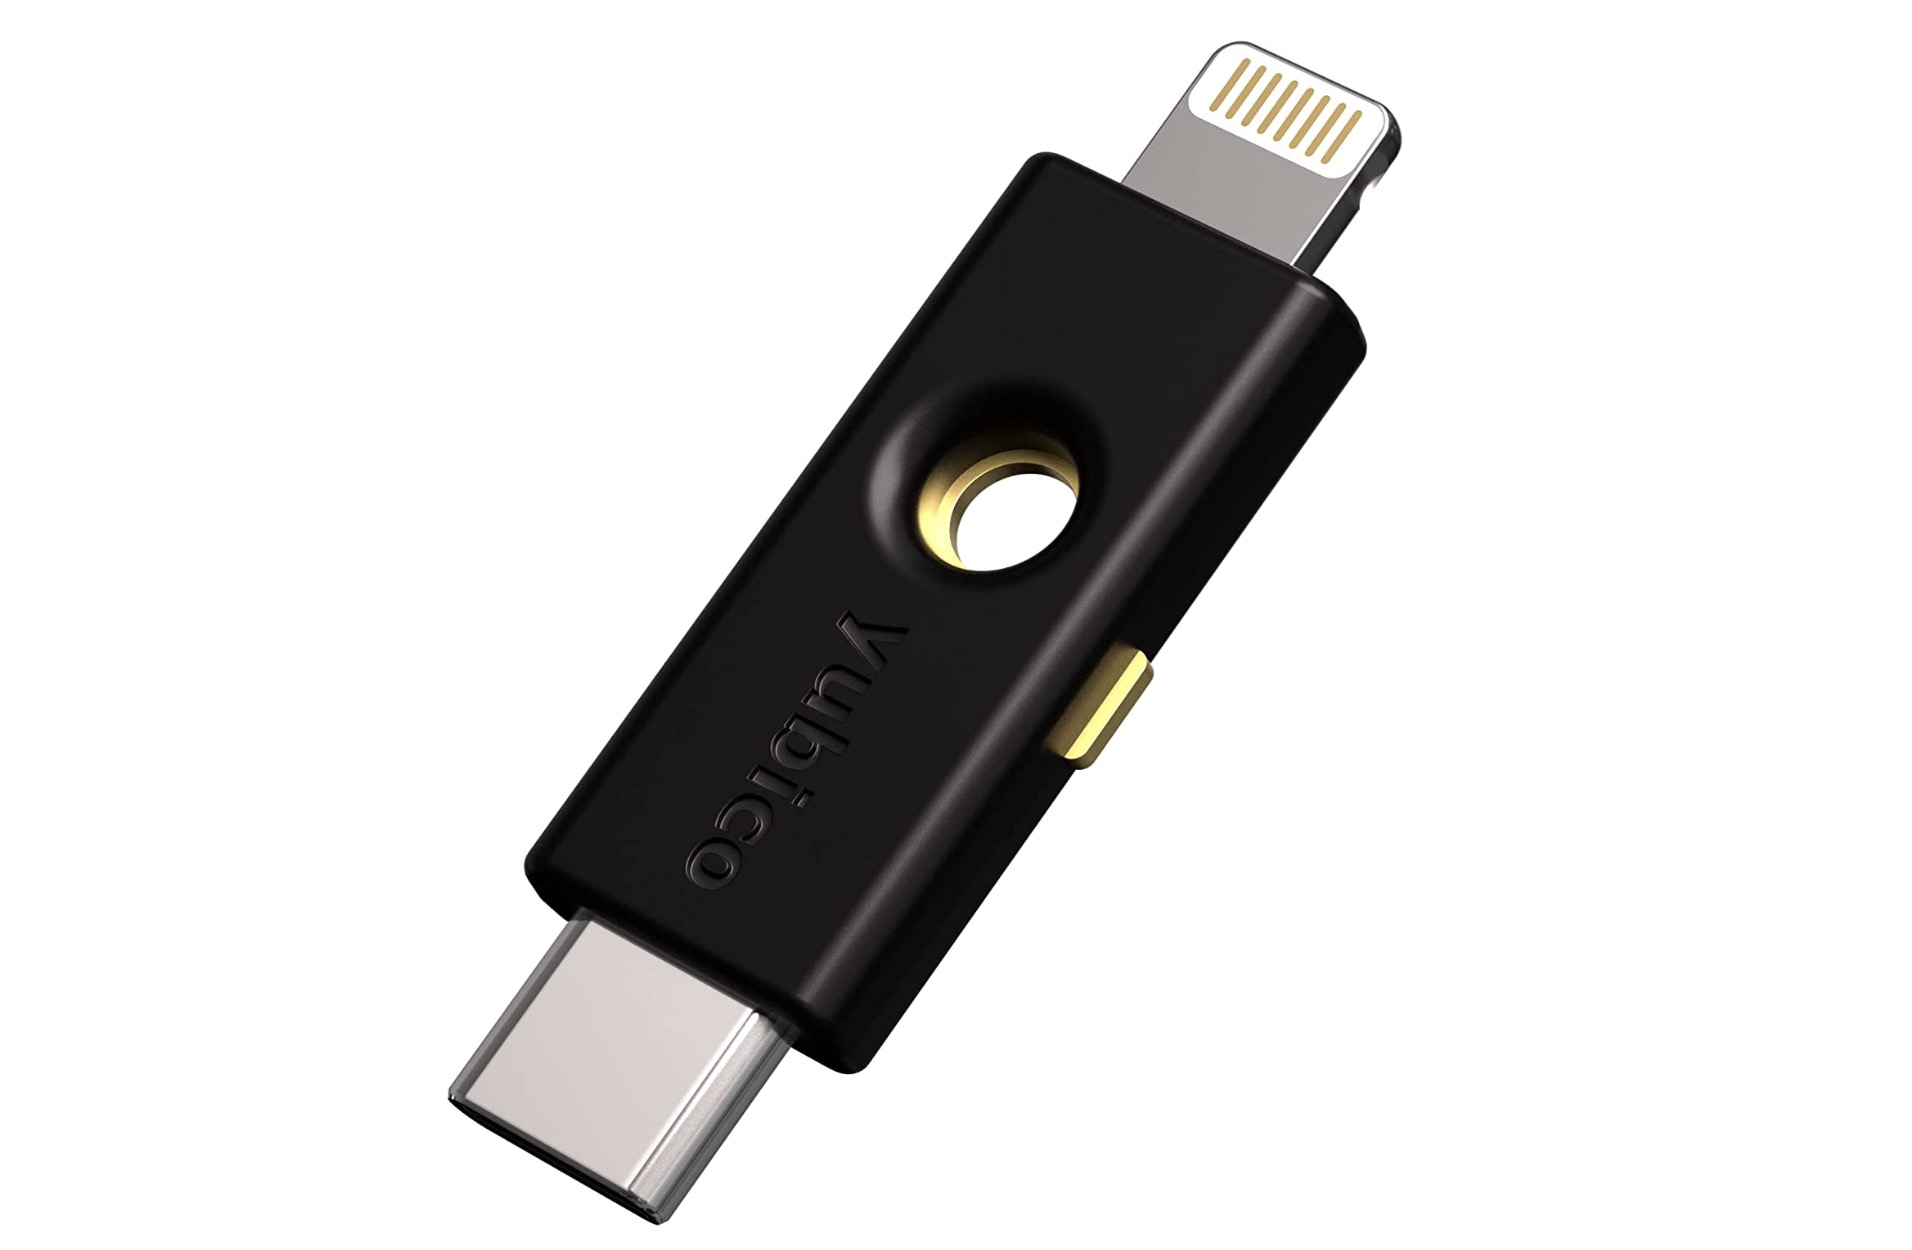
Most security keys look similar to a typical USB thumb drive, with some options available with NFC for wireless use and others equipped with Lightning, USB-C, and/or USB-A ports for direct connectivity with iPhones, iPads, and Macs.
There are many options on the market when buying security keys, but the main things to consider when choosing one are that it is FIDO Certified and that it has a connector that works with your Apple devices. Some options recommended by Apple include:
Visit the FIDO Showcase website for a complete list of keys certified by the FIDO Alliance.
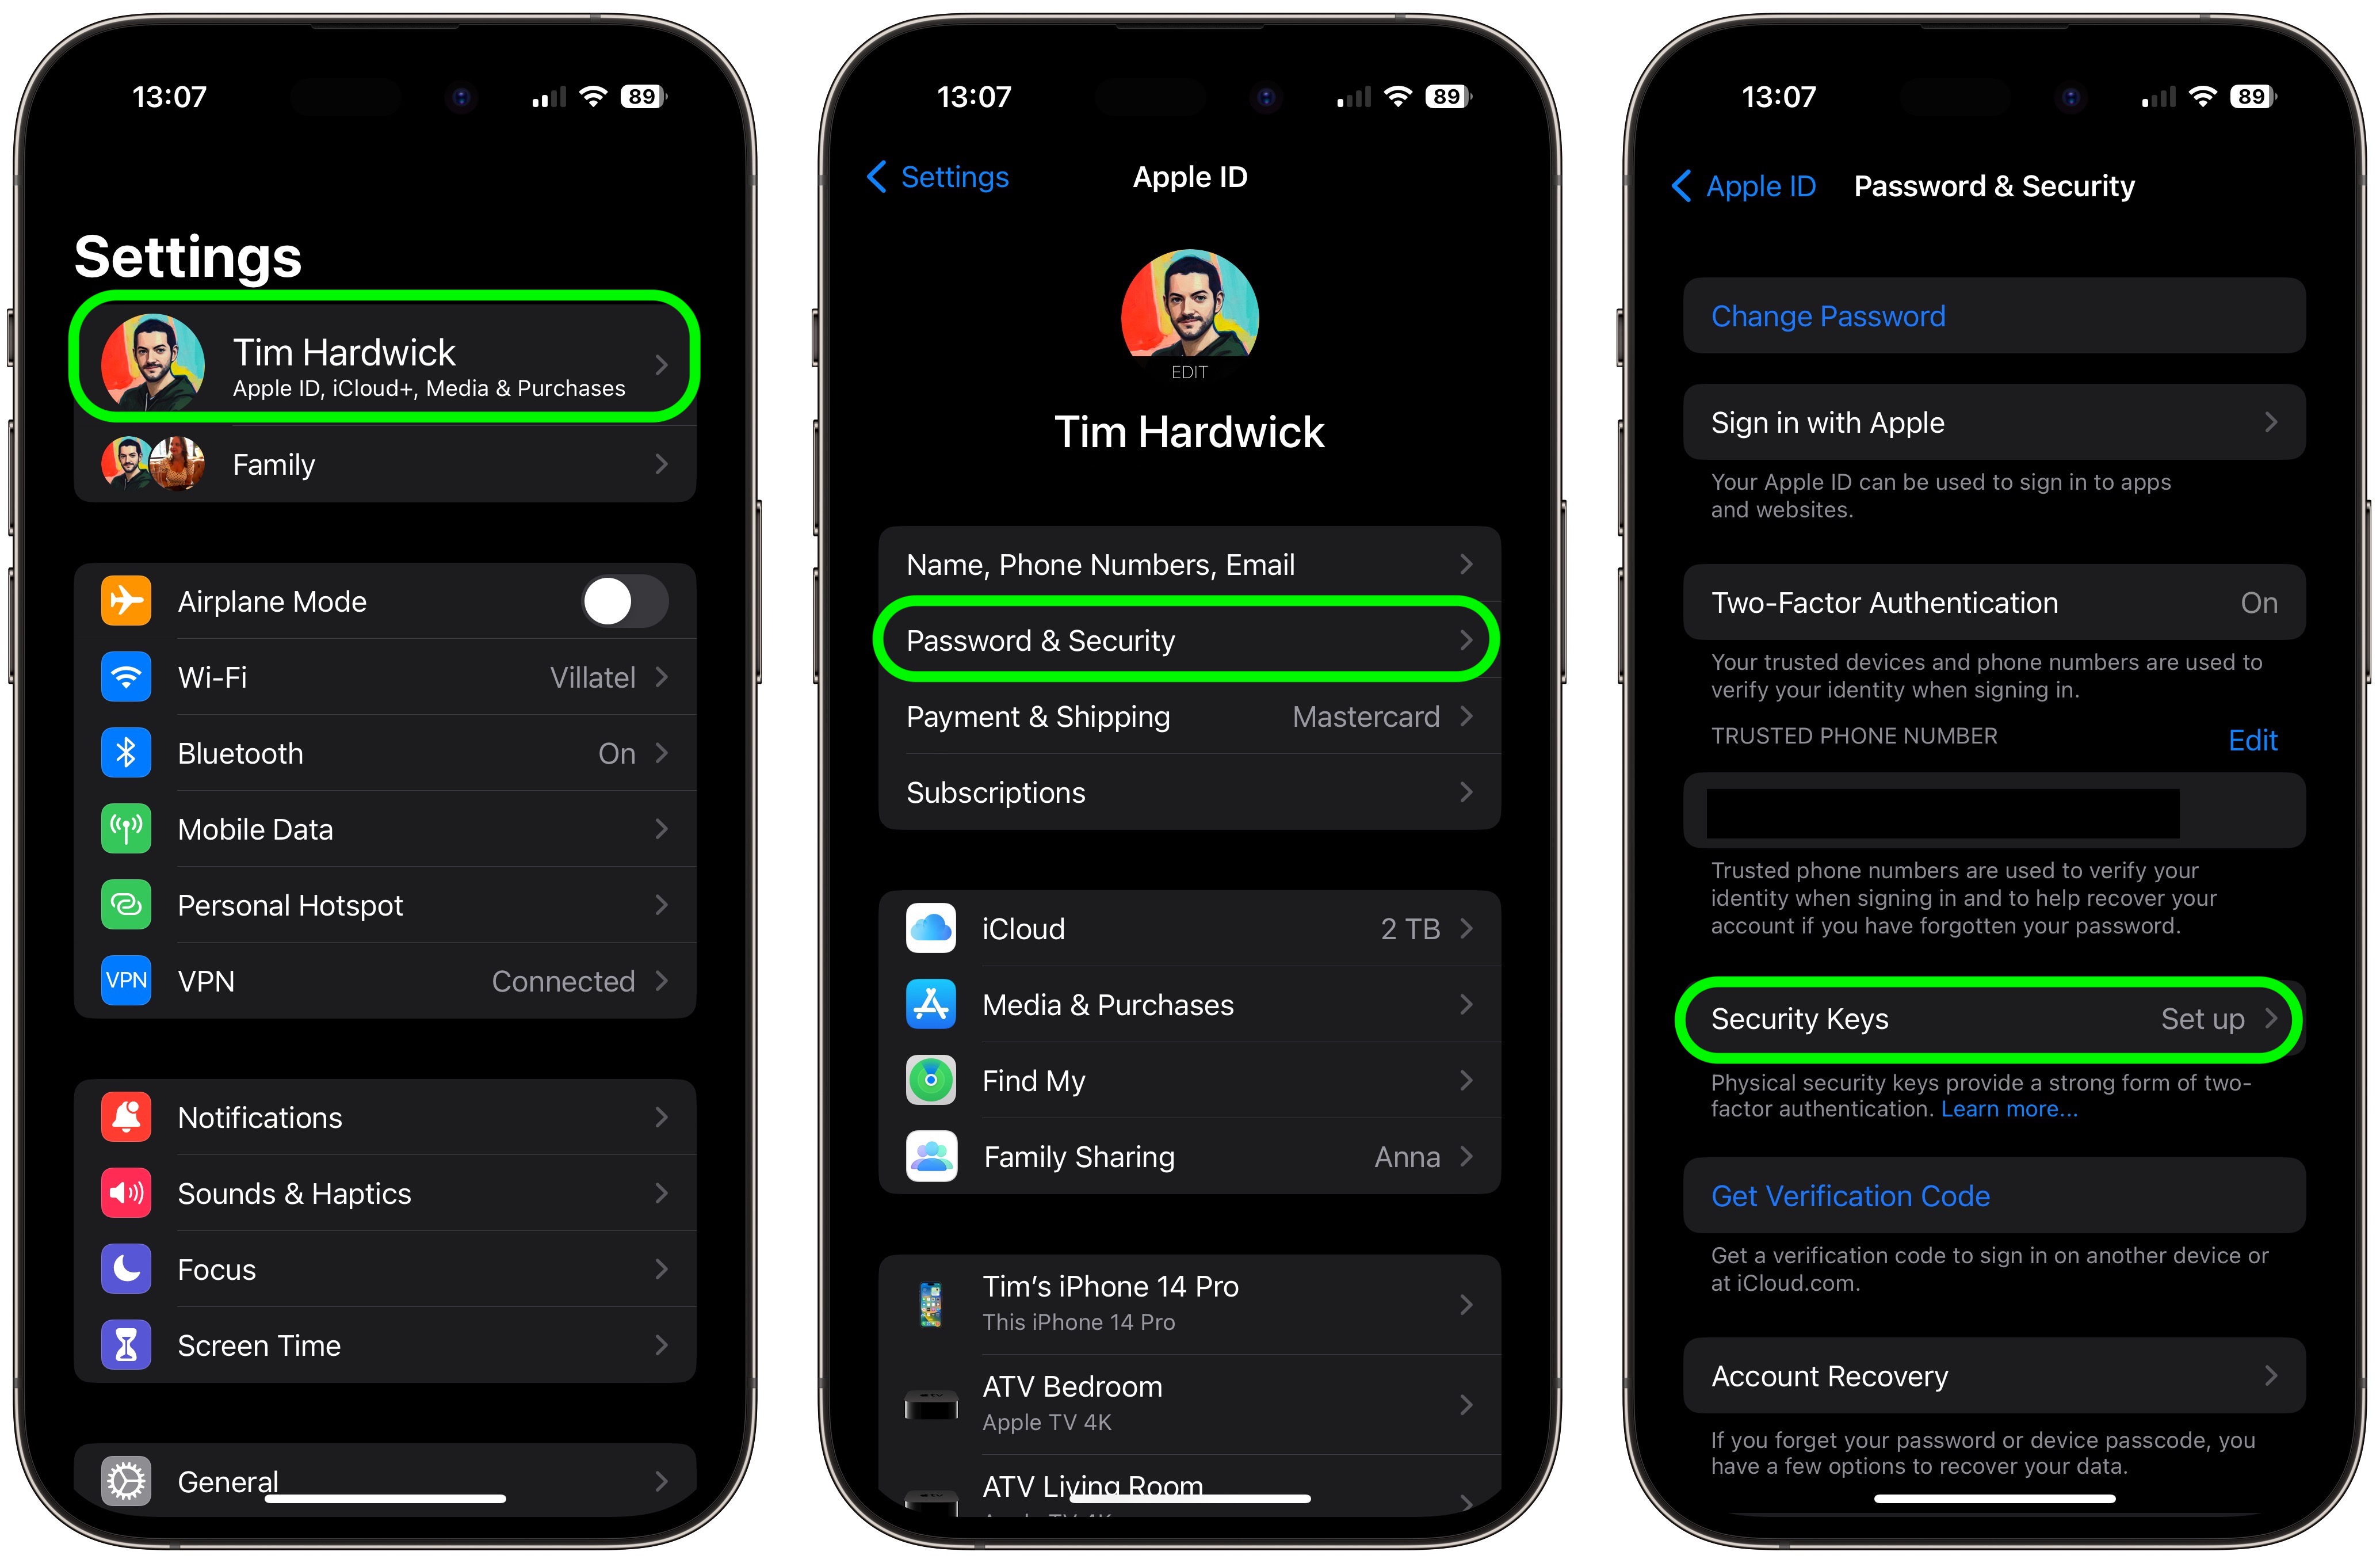
How to Enable Security Keys on iPhone and iPad
- Launch the Settings app on your iOS device.
- Tap your name in the Apple ID banner.
- Tap Password & Security.
- Tap Security Keys.
- Tap the blue Add Security Keys button and follow the on-screen instructions.
You can remove security keys at any time by repeating the steps outlined above and tapping or clicking on Remove All Security Keys. Doing so causes your Apple ID to revert to using a traditional six-digit verification code for two-factor authentication.
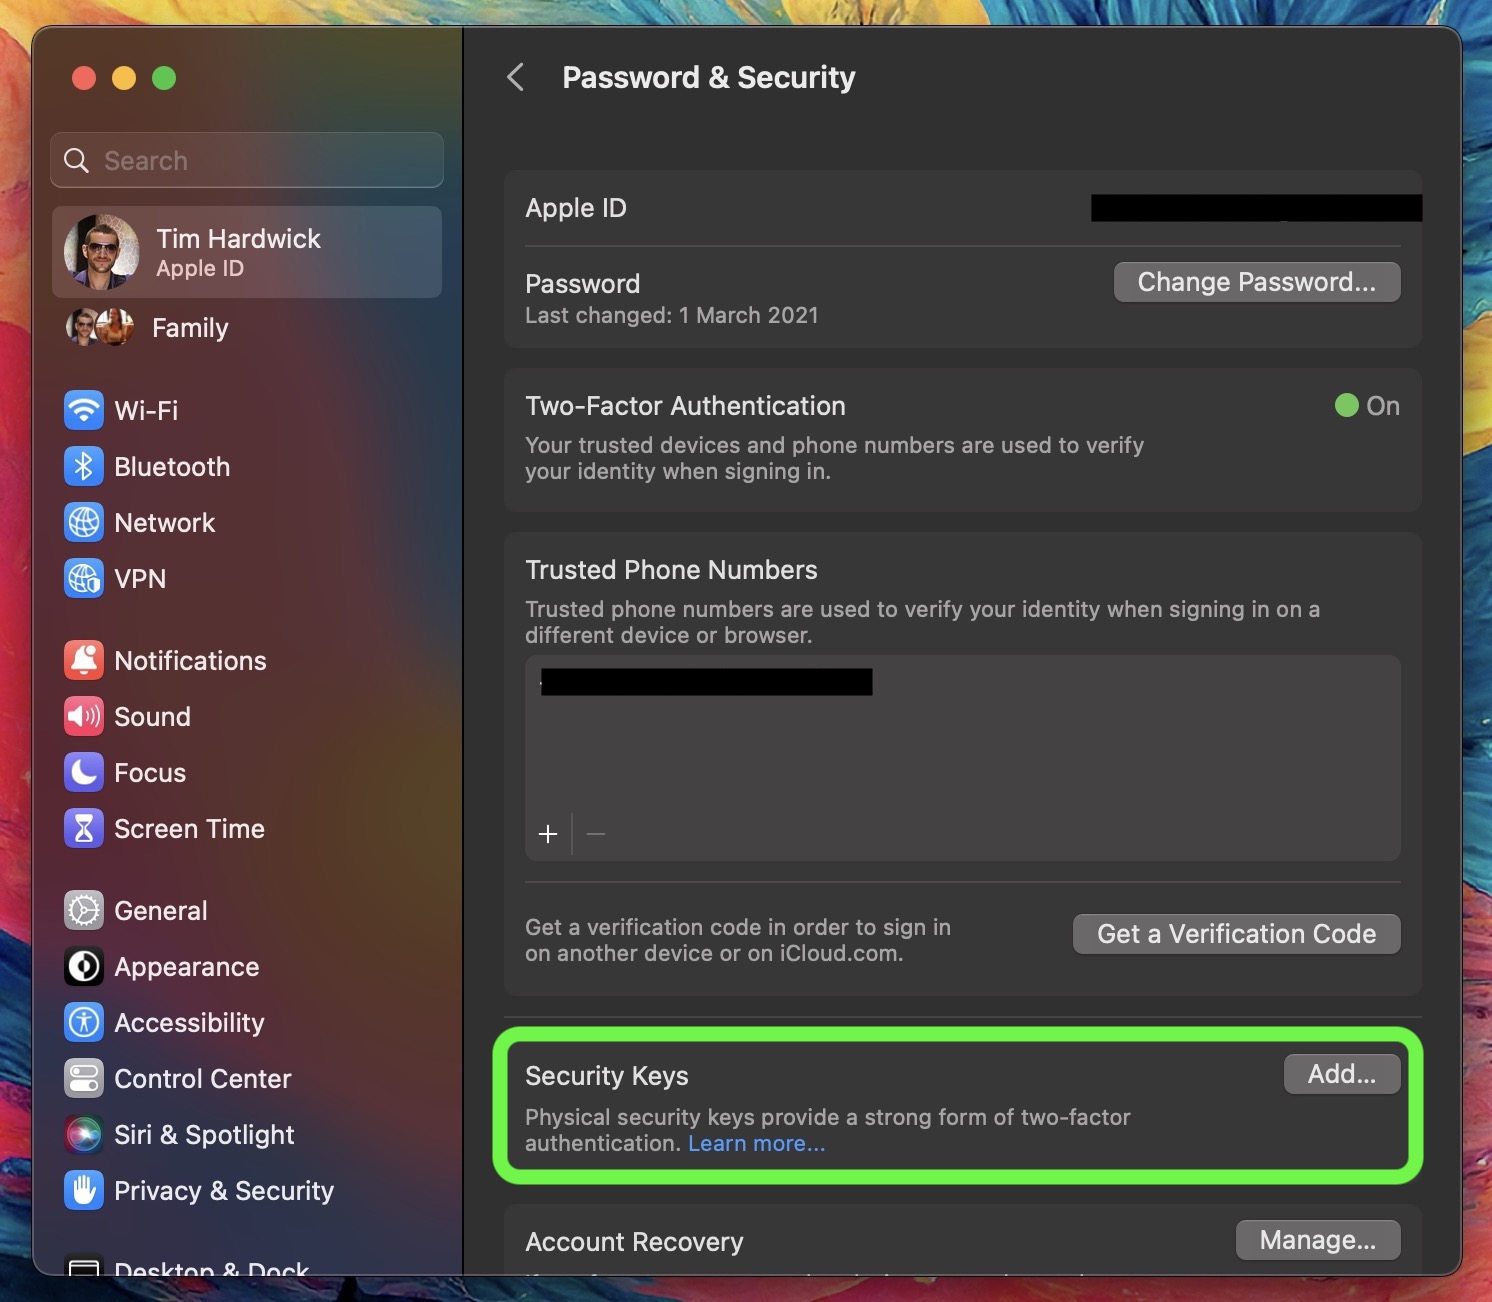
How to Enable Security Keys on Mac
- Click the Apple symbol () in your Mac’s menu bar and choose System Settings….
- Click your name at the top of the sidebar.
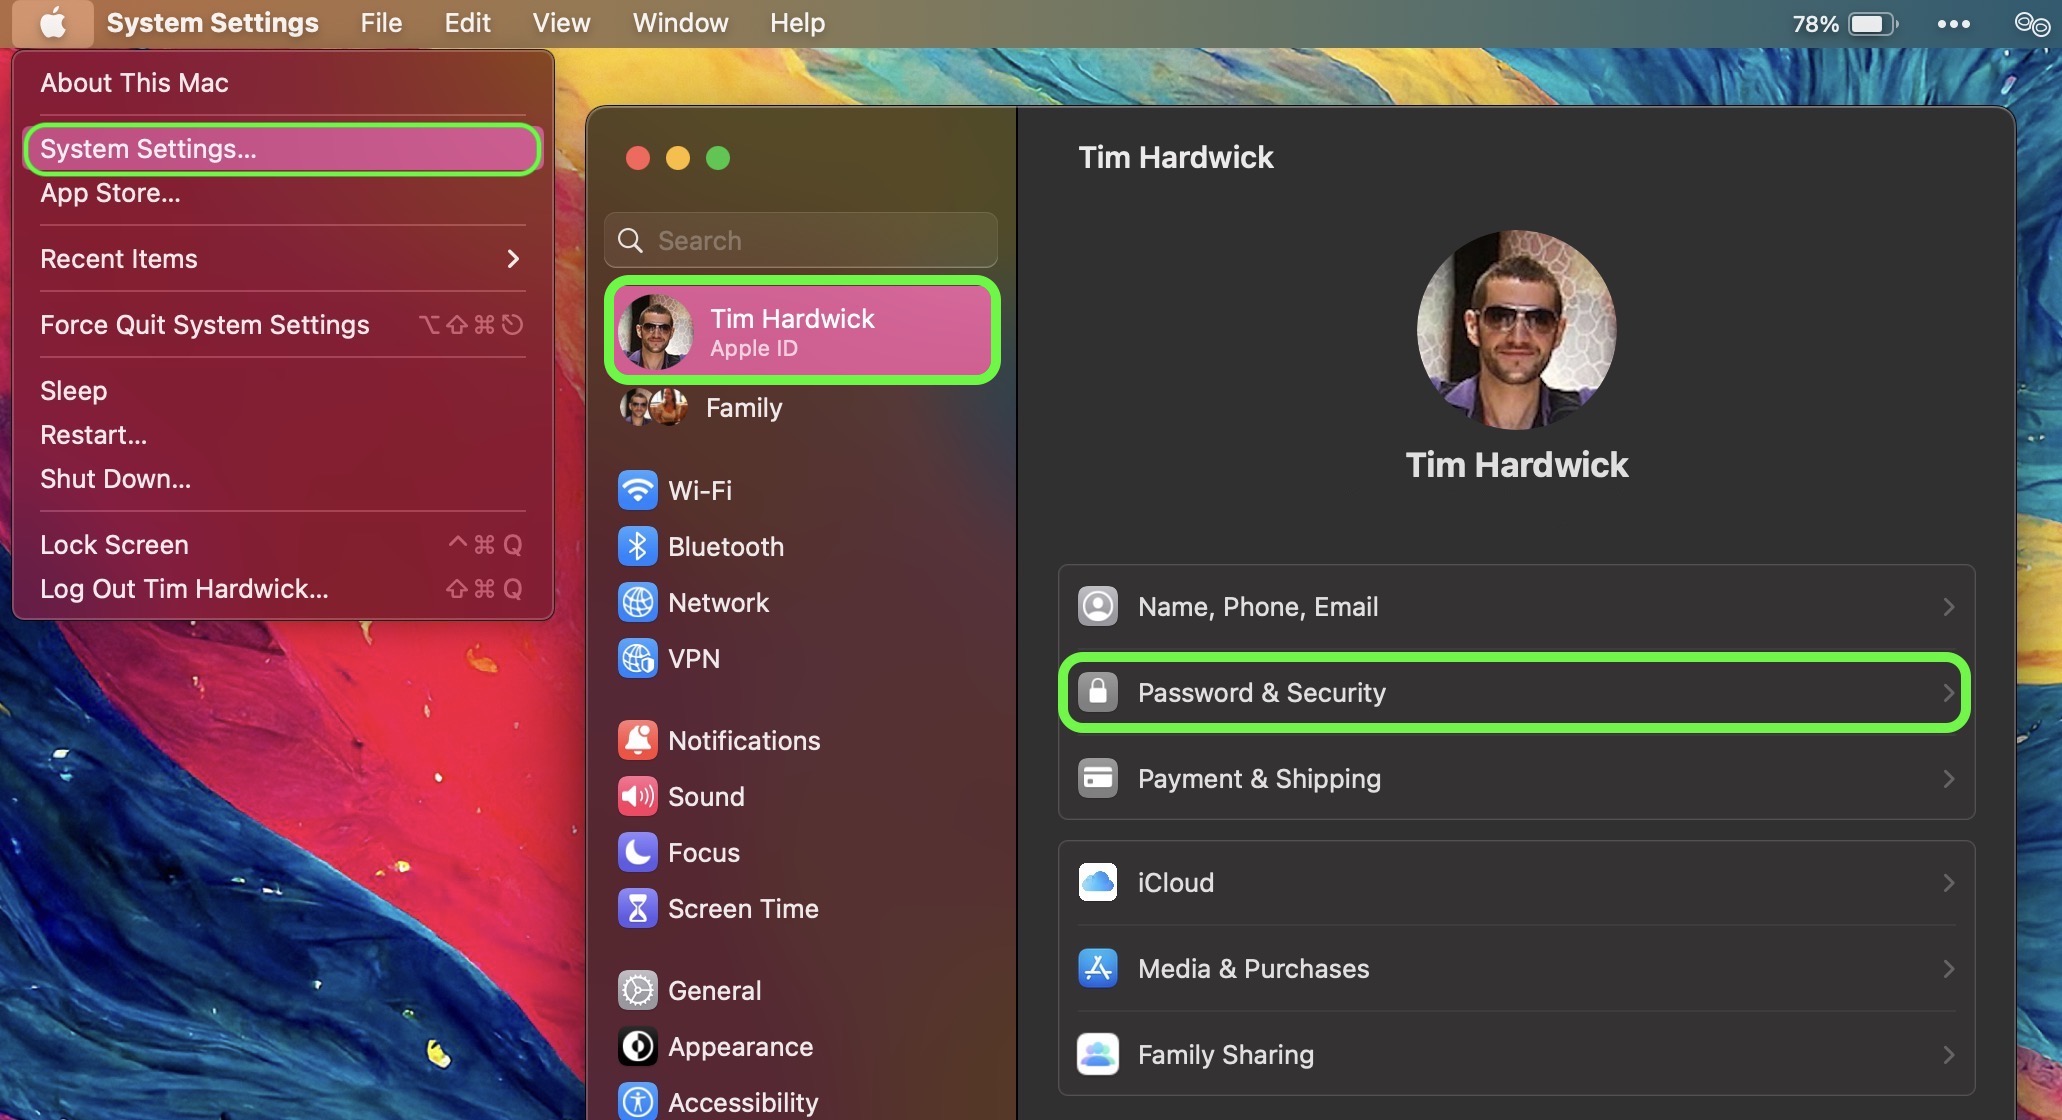
- Click Password & Security.
- In the “Security Keys” menu section, click Add…, then follow the onscreen instructions.
After following the above steps you will be given the opportunity to review the devices linked to your Apple ID, with options to stay signed in to or log out of any associated Apple devices.
You can stop using security keys on your Mac by going to System Settings -> [your name] -> Password & Security. Click Security Keys, then click Remove All Security Keys. Doing so causes your Apple ID to revert to using a traditional six-digit verification code for two-factor authentication.
This article, "How to Protect Your Apple ID With Security Keys" first appeared on MacRumors.com
Discuss this article in our forums